
Token Management
A token acts as your system's identity credential: it tells Trustpair who is making the request and what they are allowed to do. Each token carries a specific set of permissions, scoped exactly to the modules and actions your integration needs.
Tokens are sensitive credentials. A token must be treated like a password. It should never be shared openly, stored in plain text, or visible in logs, emails, or code repositories. Access to a token should be restricted to the people and systems that strictly need it.
1. How to create a token
Only workspace admins can create API tokens. Bearer tokens are created and managed exclusively from the Trustpair web app — they cannot be generated programmatically.
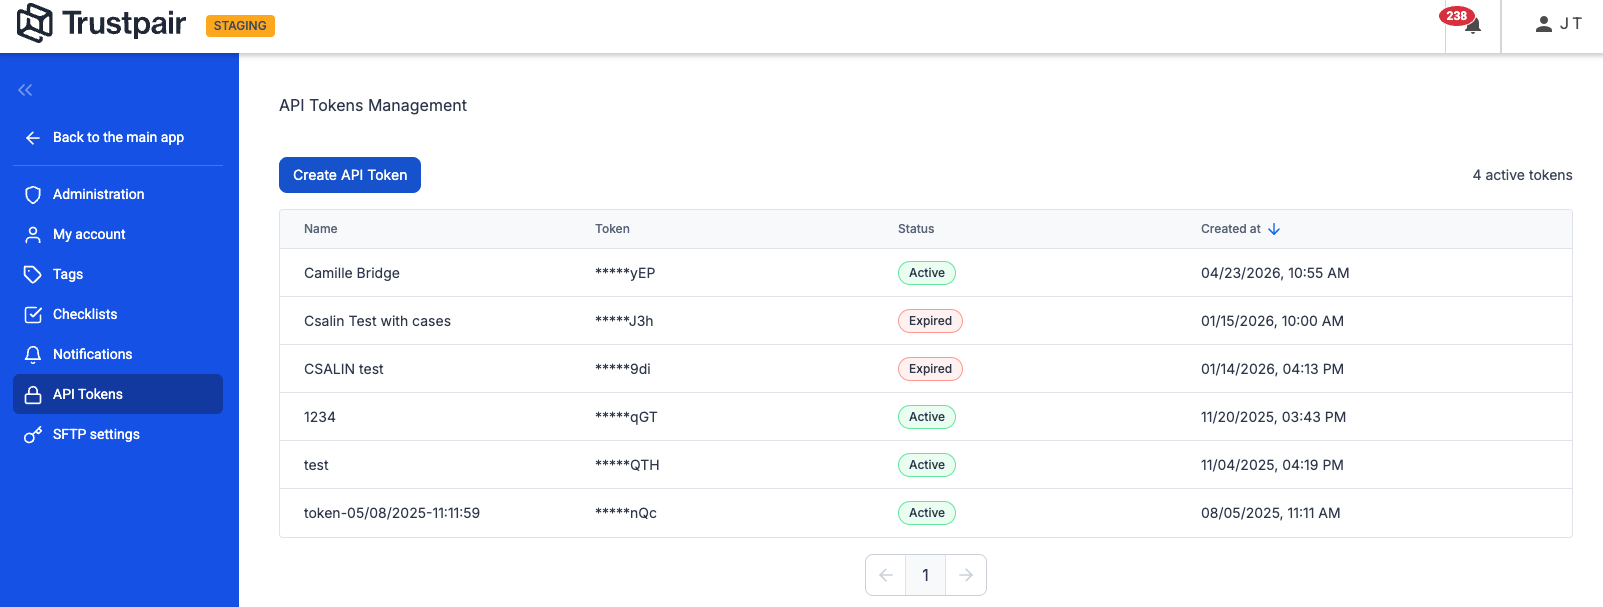
Step 1️⃣ — Open the Token Management page
From the Trustpair web app, go to Administration → API Tokens. You will see a list of all existing tokens and their current status.
Step 2️⃣ — Click "Create API Token"
A creation form will appear.
Step 3️⃣ — Name your token
Give the token a clear, descriptive name so you can identify its purpose later (e.g. SAP-Production, Kyriba-Connector). Avoid generic names like test or 1234.
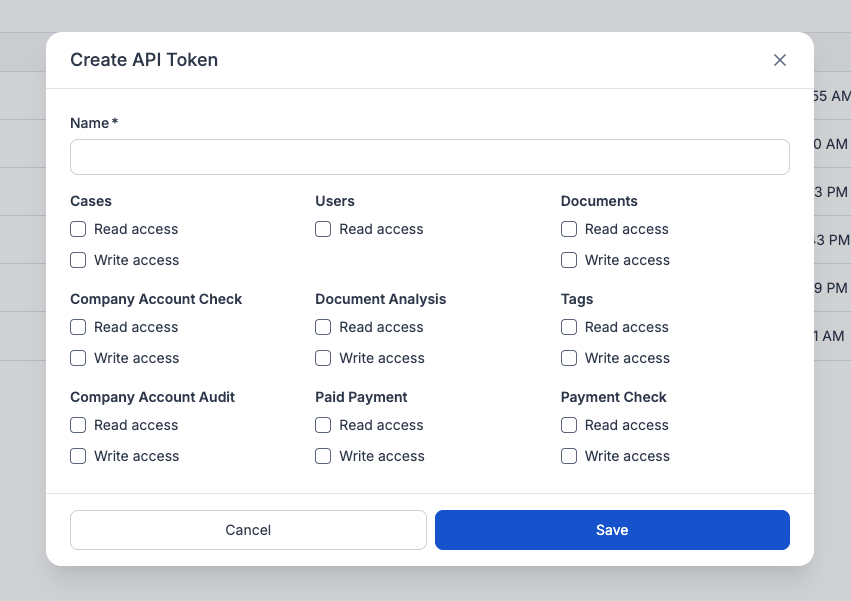
Step 4️⃣ — Select permissions
Choose exactly which permissions to grant. Each permission can be set to read-only, read/write, or not granted at all. Only select what the integration actually needs — granting excess permissions increases risk if the token is ever compromised.
The permissions available to you depend on your Trustpair subscription. If a module is not visible, it is not included in your plan.
For a full breakdown of what each permission covers, see the Permission Reference section below.
Step 5️⃣ — Save and copy your token immediately
Once you click Save, your token value is displayed once and only once. Copy it immediately and store it securely (e.g. in a secrets manager or a secure vault). Then click Close.
After you close this screen, the full token value can never be retrieved again — not by you, and not by Trustpair support. If you lose it, you will need to revoke the token and create a new one.

2. How to manage your tokens
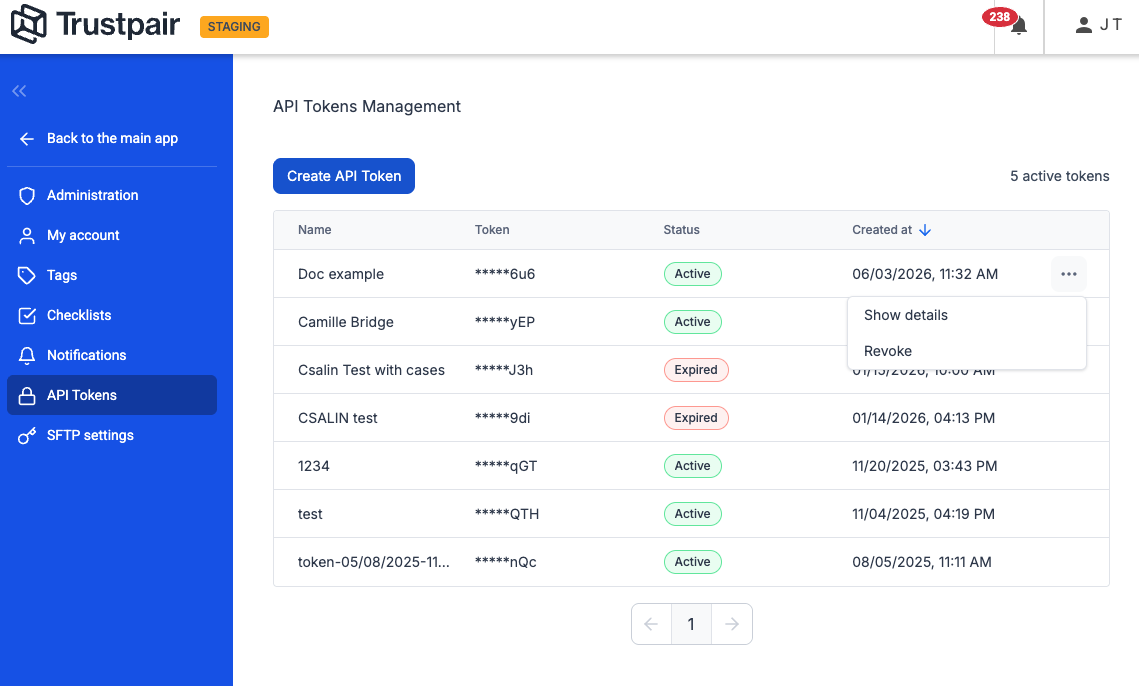
Viewing token details
Click the ⋯ menu on any token in the list and select Show details to review its name, permissions, and current status. The full token value is never shown again — only the last few characters are visible for identification purposes.
Revoking a token
If a token is compromised, no longer in use, or needs its permissions updated, revoke it immediately.
How to revoke:
- Click the ⋯ menu next to the token
- Select Revoke
The token is instantly deactivated and can no longer be used to call the API. Revoked tokens remain visible in the list for audit purposes, but they cannot be reactivated.
Tokens cannot be edited. If you need to change the permissions on an existing token, you must create a new token with the correct permissions and revoke the old one.
Permission reference
| Permission | What read access allows | What write access allows |
|---|---|---|
| Company Account Check (M1 — Control) | View vendor verification records | Create and update vendor verification records |
| Company Account Audit (M2 — Audit) | View vendor pairs and their audit data | Create and update vendor pairs |
| Payment Check (M3 — Payment) | View payment verification results | Create and submit payment checks |
| Cases | View cases and their details | Create cases, add comments, submit and manage overrides |
| Users | List workspace users | — |
| Documents | Download documents | Upload documents |
| Document Analysis | View AI analysis results on documents | Trigger an AI analysis on an uploaded document |
| Paid Payment | View payment history | — |
| Tags | View and List tags | Create and manage tags |
The required permissions for each API endpoint are documented in the API Reference.
Updated about 1 month ago